Snake Game on GitHub Profile

"Your code is your credibility; the only way to prove your expertise is by showcasing what you're capable of building."

Customizing your GitHub profile can help you demonstrate your creativity and your skills and knowledge about profile customization.
Though it might sound like basic personalization, but GitHub is about showcasing what you know and are capable of doing. And demonstrating a profile that is unique and has attractive elements can help you stand out from the crowd.

For this, GitHub offers users with "readme.md" customization which appears on the top of the profile.
And this is not just to add basic text and links, but is itself a live running web application, which you can customize and code to work the way you want it to.

This brings us to GitHub Profile ReadMe Maker (GPRM) which is an open source project, which you are free and open to use for your personal use.
It has a built-in set of templates, layouts and themes, which you can choose from, and decide which one do you wish to proceed with for your profile.
You can add stats, charts, graphs, links, buttons and images, and a lot more.
Do check it out from the above linked button (GPRM) and create a readme.md file for your account immediately.


The profile readme is a simple markdown file (.md), which is of course a text file, but is beyond your thinking when it comes to it's capabilities.
If you are familiar with web development, you definitely know about HTML, CSS and JS. These need to be coded individually and then executed in order to see an output. Now if you also know about web application development, then you know about APIs and linkage of other applications into your page.

This markdown file, is also capable to execute your webapplications in realtime, and show it up on your GitHub profile page!
How ? It accepts codes in basic HTML format, so you can use the standard structures, along with inline CSS too! And the best part, you are free to use API from other websites / applications in order to show stuff on your profile.
And when combined with GitHub actions, you can use an external API to generate any media, and then use that media to show on your profile.

Click HERE to visit my GitHub Profile to have a preview!

And this is exactly how we are going to bring the snake game on our contribution chart today!


Step 1 : Create a Profile Repository

On your GitHub profile, in case you haven't already, then create a new repository, and set the repo name exactly the same as your GitHub username, remember that it is case sensitive.
Inside this repository, create a new file "README.md"


Step 2 : Create your Actions YML file

Now we need to create an action, that will generate the animation file as per our contributions chart, required for the snake game.

For this, head up to your repository, create a directory named ".github", sub directory "workflows", and then the file "snake.yml".

YOUR_GITHUB_USERNAME --> .github --> workflows --> snake.yml

In this snake.yml file, copy and paste the following lines of code : 


name: GitHub Snake Game


on:

  # Schedule the workflow to run daily at midnight UTC

  schedule:

    - cron: "0 0 * * *"


  # Allow manual triggering of the workflow

  workflow_dispatch:


  # Trigger the workflow on pushes to the main branch

  push:

    branches:

      - main


jobs:

  generate:

    runs-on: ubuntu-latest

    timeout-minutes: 10


    steps:

      # Step 1: Checkout the repository

      - name: Checkout Repository

        uses: actions/checkout@v3


      # Step 2: Generate the snake animations

      - name: Generate GitHub Contributions Snake Animations

        uses: Platane/snk@v3

        with:

          # GitHub username to generate the animation for

          github_user_name: ${{ github.repository_owner }}


          # Define the output files and their configurations

          outputs: |

            dist/github-snake.svg

            dist/github-snake-dark.svg?palette=github-dark

            dist/ocean.gif?color_snake=orange&color_dots=#bfd6f6,#8dbdff,#64a1f4,#4b91f1,#3c7dd9

        env:

          GITHUB_TOKEN: ${{ secrets.GITHUB_TOKEN }}


      # Step 3: Deploy the generated files to the 'output' branch

      - name: Deploy to Output Branch

        uses: peaceiris/actions-gh-pages@v3

        with:

          github_token: ${{ secrets.GITHUB_TOKEN }}

          publish_dir: ./dist

          publish_branch: output

          # Optionally, you can set a custom commit message

          commit_message: "Update snake animation [skip ci]"


Once pasted, commit changes for this snake.yml file.


Step 3 : Bring the YML file into Action

Go to the home directory on your Profile repository. 
Now you must see a directory ".github" and a file "README.md".

For execution of the YML file, go to the Actions tab, from the left pane, choose "All Workflows"


Now you will be able to see the list of workflows that were brought into execution, since this repository was created.
Here you will see a workflow named "GitHub Snake Game" and one or two more similar to it, regarding the creation of the yml file, and the readme file.

Again on the left pane, Actions tab, switch to "GitHub Snake Game" workflow.


Now on the GitHub Snake Game workflow, again you will find a list full of workflows, before the list, on the top, you will find "This workflow has a workflow_dispatch event trigger".
On the right, you will find a button "RUN WORKFLOW". There let the branch be as "main", and hit "Run Workflow".

Now it would take a minute or two, and it will be completed. This is how it should appear after pressing run workflow : 


The task must show in queue, if not, refresh the page. If still doesn't show up like this, run the workflow again.

Once it is complete, it should show up like this : 


So we are done executing the workflow.
Now you need to head up to the root of your profile directory, and under branch, you must be able to see  that a new branch has been created named "output".


Head up to the output branch, and here you should see that few files have been generated. 

Two of them would be named "github-snake.svg" and "github-snake-dark.svg". These are basically scalable vector graphic animations, that have been generated through the workflow.
It fetches data from your profile each midnight, generates a new file, overwriting the old one. Now we just need to add these files to our README.md, so that this animation is shown along the home page of our GitHub profile.

 
Step 4 : Add the Animation to your Profile

This is the final step we need to perform. 
We created a workflow that will generate the animation file as per our contributions to GitHub. And that file just needs to be added to display on our profile.

To do so, open the README.md file, from the main branch, in edit mode, and add the following line of code : 

![snake gif](https://github.com/YOUR_USERNAME/YOUR_USERNAME/blob/output/github-snake-dark.svg)

And remove "-dark" from the line if you want it on the light theme.

Commit changes.
Go to your profile homepage, refresh, and done!

Now you have a cool snake game on your GitHub profile, where the snake is eating up all your contributions :p


Summary :
1. Creation of Profile Repository.
2. Created the README.md file for profile description.
3. Created a workflow to generate snake on contributions animation.
4. Brought the workflow into ACTION to generate necessary files.
5. Imported the file into the README markdown 


Here is a detailed tutorial on YouTube in order to achieve the results.
If facing any issues, comment down on the video, we will help you out!


Windows 7 in 2023 ?


Are you too tired of using Windows 11 ?

The most frustrating part of using your PC is getting slow. Traditionally, Microsoft has been releasing newer versions of Windows, each making the features way better than the previous one, side by side making it slower than the earlier edition. And the same took place with the release of Windows 11.

Microsoft has now officially ended the support period for our beloved, Windows7, which was considered to be the best in performance operating system, which was known for its ultra wide compatibility and performance indicator, even when running on a Potato PC.


Windows 7

Released on October 22, 2009, Windows 7 marked a significant milestone in Microsoft's operating system history. It succeeded Windows Vista and quickly gained popularity for several reasons. One of the standout features was its user-friendly interface. Windows 7 introduced the Aero graphical user interface, characterized by translucent window frames and improved navigation, providing a more visually appealing and accessible experience for users.


Today, let's have a quick experiment, by attempting to install Windows 7, on our modern day machines.

As the newer generation PCs with the all new hardware, there is a really low chance to install an operating system that was discontinued long back before these hardware components were even designed.


Downloading Windows 7

You of course can get the official disk image file for installation of Windows 7, directly from Microsoft by clicking Here
But, since Microsoft has officially discontinued it, they won't let you download it either.

Don't worry, I've got you backed up !
Here I provide you with an archive, that has the complete ISO of the operating system, along with an activator, so that you don't need to worry about activation.


Pre-Requisites of Installing Windows 7

Dual Core Processor @ 1.20GHz
1 GB RAM
64mB Video Memory
40GB Free Disk Space
LEGACY BIOS IS A MUST


Installation

Step 1 :
Extract the files out from the downloaded archive

Step 2 :
Run "WinToBootic.exe" as Administrator

Step 3 : 
Insert a USB drive into your PC and back up any data from it (minimum 8GB)

Step 4 : 
Select the USB drive and ISO file into the application window

Step 5 :
Perform the flashing and let it write the files onto the USB drive

Step 6 :
Reboot your PC from the bootable media you just created

Step 7 :
Install Windows

Step 8 :
Enjoy !


Limitations

Windows 7 was released back in the year 2009, which was the era of Core2Duo processors, which used to run on G41 chipsets and Legacy BIOS
Today, we are using B650 / B760 motherboard, all running the modern 12th Gen Intel and 7th Gen AMD processors, that too with UEFI, TPM and Secure Boot

This is the only limitation to installing Windows 7. Many modern day machines fail to install this legendary operating system due to the only reason, old software isn't able to recognize modern hardware.
However you may give it a try, if luck persists, it will work.


Conclusion

Here you have come to the end of the blog. Give a shot to installing Windows 7, specially if you have a weak specifications PC that is running really slow.

Thanks for Reading !


Welcome to Technology Hell !

Your only stop to find solutions to all your problems !


Hi there! My name is Nitish Singh, and I'm a tech blogger, YouTuber, and content creator. 

I'm passionate about all things tech, from gaming to programming to web development. I love sharing my knowledge and experiences with others, and I hope you'll find my blog helpful.

On this blog page, you will find lots of content related to recent software releases, reviews on Gaming Gear and other tech based products, suggestions for your upcoming purchases in the tech field, and some programming and web development stuff too !


What I Do ?

Currently I am an Engineering Student, who loves to explore new stuff and figure out how things work !
Mainly I work as a Content Creator on YouTube, A Freelancer in the Graphical Sector, Amazon Affiliates, Web Monetization, Digital Marketing, Google Ads, Product Photography, Tech-Tweaks and a lot more.

Mainly I focus on my YouTube content

  • Tutorials on how to use different tech products and services
  • Reviews of new gadgets
  • PC Gaming Tips and Tricks
  • Gaming Gear Testing
  • Montage Creation
  • Personal Stories and experiences about my own journey into the world of technology

What I Am About ?
I'm all about making technology accessible and understandable for everyone. I believe that everyone should have the opportunity to learn about and use technology, regardless of their background or experience. I want my content to be informative, engaging, and fun.


Why I Do It ?
I love sharing my knowledge and experiences with others. I get a lot of satisfaction from helping people learn new things and solve problems. I also believe that technology can be a powerful tool for education and empowerment. I want to use my content to help people use technology to improve their lives.


What's Next ?
I'm always looking for new ways to learn and grow as a technology blogger and content creator. I'm excited to continue sharing my knowledge and experiences with others, and I hope you'll join me on my journey.


Connect With Me !
You can connect with me via Instagram, LinkedIn, Twitter, and many more !
Links provided at the bottom of the page


I hope this blog post is helpful. Let me know if you have any other questions.
Thanks for Reading 🍻

TranslucentTB Not Working ? Here's the fix !

A lightweight utility that makes the Windows taskbar translucent/transparent on Windows 10 and Windows 11.


TranslucentTB has been in the market since August, 2018, and has been widely used by PC enthusiasts who want a good looking desktop.
But since recent Windows 11 updates, this app no longer works

Don't Worry !
This blog will help you fix this issue under 2 minutes and get it working again!

Step 1 : Download Vivetools


Step 2 : Extract files to C:\zVive


Step 3 : Run CMD as Admin and enter the following codes

Code 1 : cd C:\zVive
Code 2 : vivetool /disable /id:26008830


Step 4 : Restart


And after doing the instructed steps, your taskbar should turn transparent !


For a detailed instruction tutorial, watch this video : 


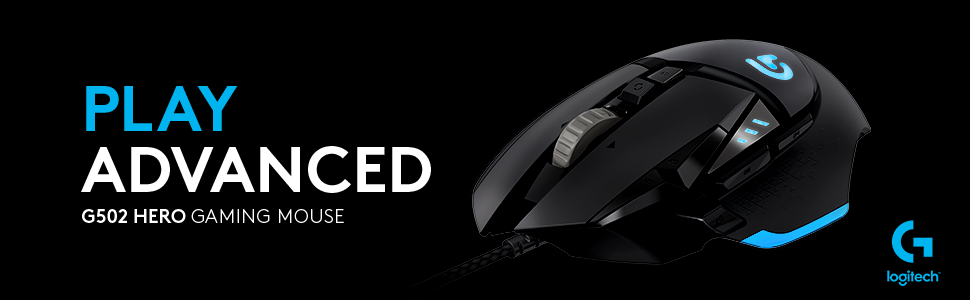
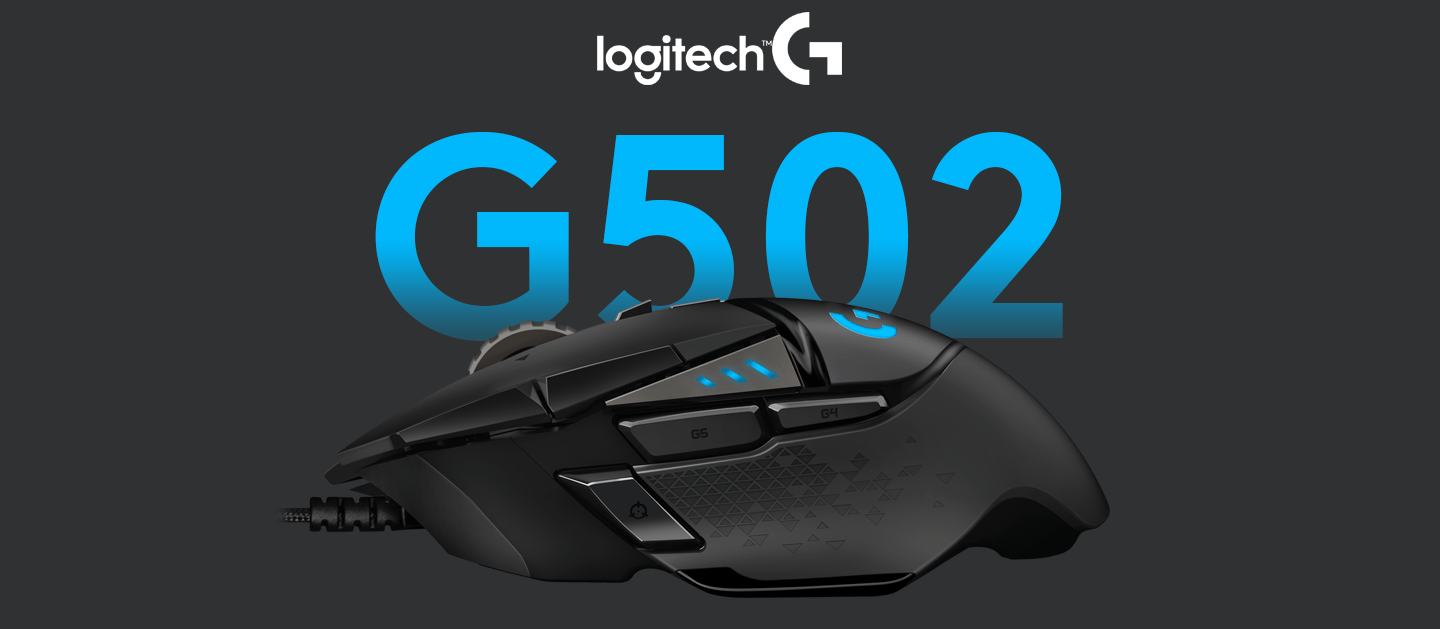
Logitech G502 HERO

G502 HERO High Performance Gaming Mouse


Engineered for advanced gaming performance. G502 HERO features HERO 25K gaming sensor with sub-micron precision tracking, customizable LIGHTSYNC RGB, onboard profiles, repositionable weights and more.

HERO 25K is our most accurate gaming sensor ever with next-

25K is our most accurate gaming sensor ever with next-gen precision and a ground-up architecture. With the fastest frame rate processing yet, HERO is capable of 400+ IPS across the 100 - 25,600 DPI range with zero smoothing, filtering or acceleration. HERO 25K achieves competition-level precision and the most consistent responsiveness ever. Be sure to customize and tune your DPI settings using Logitech G Hub.


CONTROLS AT YOUR FINGERTIPS

11 PROGRAMMABLE BUTTONS

Use Logitech G HUB to program your favorite commands and macros to each of the 11 buttons. Build, crouch, melee, heal … put your power moves at your fingertips. Save ready-to-play profiles directly to the mouse to take your settings with you anywhere.


TUNABLE WEIGHTS


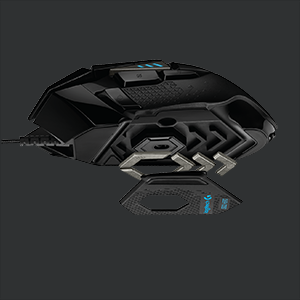
Fine tune mouse feel and glide to your advantage. Five 3.6g weights come with G502 HERO and are configurable in a variety of front, rear, left, right and center weighted configurations. Experiment with the alignment and balance to find the sweet spot to optimize your gaming performance.


LIGHTSYNC RGB 

LIGHTSYNC technology is next generation RGB that can be driven by games, audio, or your screen to deliver the most immersive RGB experience ever. Select from a full spectrum of approximately 16.8 million colors and synchronize lighting animations and effects with your other Logitech G devices. Customize it all quickly and easily using Logitech G HUB.


GAME READY DETAILS

In addition to the core performance and personalization features, many details were thoughtfully engineered and designed. Look for primary buttons with mechanical switches, rubberized side grips, magnetic weight-cavity door, and more.


VALORANT FLASH BUG

Valorant Patch 3.0 is allowing NVIDIA users to be immune to ingame flashes


Valorant was launched quite long ago, but till date, there have been many bugs in the game, some making the game fun, while some acting as unfair means to the players

Some game bugs can be very funny to look at and experience. Single player games like Skyrim have a lot of bugs in the game which made the game hilarious and fun to play. Though in competitive games bugs can be a nightmare and might give unfair advantages to players who abuse the bug.


This started with a post on Instagram claiming to remove flashes from the game, through the NVIDIA Ansel Game Filters 
By applying the Remove Hud (BETA) game filter, one could easily disable the ingame hud, as well as remove the flashes
Which is kinda unfair as players exploiting this bug are getting benefits of being immune to flashes, which is giving advantages to those players. While the ones who are playing genuinely, being flashed and then being shot in the aura of the flash, makes it tough for them to achieve victory over that battle

And coming to NVIDIA Game Filters, majority of the Valorant users have been using them in order to make their game look better, which not only improves the appearance of the game, but also helps in better visibility and makes spotting of enemies easier.


So the bug has not yet been fixed, but Riot found it better to disable all the NVIDIA filters from the game

So the game filters do not work with the game any more

No further open discussion is seen from the side of Riot neither from the side of NVIDIA

No upcoming patches or fixes are yet confirmed, but for those who are waiting for it to be fixed, hopefully it gets patched up soon


GTA V - San Andreas


   CONVERT GTA SAN ANDREAS TO GTA V


This mod is going to give you GTA V experience in GTA San Andreas

It will change all weapons, effects, textures, hud, vehicles, animations, transitions, scenes and everything to that of GTA5

It will make your game look even more realistic as compared to the standard San Andreas


This is a Pre Modded Version of the Game
So you can play it without facing any issues or errors

Just download, install and PLAY !


DOWNLOAD LINKS :


USE ANY ONE AMONG THE 3 DOWNLOAD BUTTONS


Hope you find this mod interesting


Consider Checking out my channel on YouTube


GTA V Map Mod for GTA SA


            GTA V  MAP MOD FOR  GTA SAN ANDREAS

This mod will replace the map in GTA San Andreas with the Map from GTA V

You will get a whole new experience in the game with this awesome map from the all new GTA V


Usually people face problems in installing mods. like their game crashes, the game version does not match well with the mod, or the mod creates runtime errors

So I have brought the full game, which has the mod pre installed in it
So all you need to do is to download and install the game from the setup file provided at the end of the page, and simply run the game
 
There you have your GTA San Andreas with GTA V map !


DOWNLOAD LINK : 

[ CHOOSE ANY ONE ]

https://gplinks.co/GTA5map2SA
Mirror 1


https://gpmojo.co/GTA5map2SA
Mirror 2


Mirror 3
Mirror 3


Consider Checking out my YouTube Channel for more such awesome stuff !

 YouTube Channel


See Full Installation Video on YouTube


Earn Money by using Shorte.st from your PC

Do you know that you can earn a lot of revenue from the links that you share, the pages that you send to your social friends, through your blogs, your download links, and that same app will help you to earn by mining on your PC ??
Yes, there is a very popular method of doing so, and that is by the use of a popular link shortener, which is shorte.st


In this blog, I am going to give you a complete details about shorte.st, how to use it, how to earn from it, how to maximize your earnings, and in the end, I will also explain that how you can earn by mining. So keep reading till the end of this blog !!

Make sure that you read it till the end, as I have included lots of things which are important and need to be kept in mind, and do try this method of earning, and if you are not on any web page or social platform , then you can do MINING. It will give you money for running your PC !!

This app offers several different ways to earn money. In short, you can call this earnings, 'Monetization'. As the tern describes, advertisements will be shows before your links, which is ultimately going to earn you a good amount of revenue. This method is Link Shortening.
You might have gone through links, where you get ads for 5 seconds, and then you can click on skip ad and then reach to your destination link

Showing ads before links is the first and the most preferred way. The second way is almost similar but this way is going to be used for websites or blogs, not only links. This method is Website Script. Here, you will be given your special Java Script, which you need to add on your Blog page or your Website, and then it will get monetized. After this, whenever someone opens your website, once the page is loaded, a popup screen will come up showing ads, that can be skipped in 5 seconds, and then reach the usual desired page.

The third one is almost same as the second one, but this is only for Website owners. If you own a website, then you can use the method called Developers API. You can shrink your URLs and sub links of your website with your API Token, so that the ads which pop up, their revenue comes to you.

The fourth method is Wordpress Plugin. If you write posts on Wordpress, then you can use this. This one will display ads beside your page. This is also a preferred way to get revenue after working on web pages.

The fifth method is via dlvr.it Integration. If you are using dlvr.it then you can also monetize your posts with this method, I have used all the methods, but I haven't used this one,as I do not use dlvr.it
Dlvr.it is a platform where you can control all your social posts from one place. It is absolutely free to use, and offers great work efficiency.

The last and the best method is Mining.
Mining is earning money from your PC. For mining , you need to run a mining program on your PC, and your PC will be kept under load, while it will be looking for resources to give you money in return. The working concept of mining is quite simple, it will put your system under load, and that load is going to come through online ways. It will be hunting all over the internet for Bitcoins, but don't worry, it will be paid to you in the form of Dollars ($).

 Explained a lot about mining, so lets see that how you can get into Shorte.st and start earning !!

IT IS RECOMMENDED THAT YOU USE MY REFERRAL CODE, BECAUSE IF MULTIPLE PEOPLE ARE CONNECTED TOGETHER, THEN YOUR AVERAGE PAYMENT WILL ULTIMATELY RISE

CLICK HERE  to get to my referral code , and then follow the instructions that are given below :-)

Once you click on the link, then you will reach to this sort of a page:
Then you need to click on the JOIN button

Then you will get this sort of a page:

Fill with all the details, then if asked, then check the mail of the email id which you used, there will be a verification mail, use it to activate your account

Then you must have a PayPal account. You can go to the PayPal's official page and you can sigh up for free. Just create an account, then verify your account, then you need to link your PayPal account with Shorte.st account. Remember, you can create a complete account on PayPal without any sort of a bank account. When you earn enough of money on Shorte.st, then you can connect a bank account with PayPal, and then withdraw the money from Shorte.st.
The best thing about SHORTE.ST is that you get a BONUS OF 1$ for the first 100 views on your website script or your shortened link.

Let me just show you my statistics on the shore.st page :
   All your earnings will be shown here in the form of graphs.


Now you can start shortening links, by copying the original link, and pasting it in the "Shorten URL and get paid" box, then click on SHORTEN, then a small URL will come up in that box. Now you can share this shortened URL with your friends, use this in youtube descriptions, create download links, and doing that will show ads for 5 seconds, after which the user can skip it. This will get added up to your shorte.st account.

For using the other methods for earning, you can click on the button named "LINK TOOLS"


PayPal is recommended for collecting money from shorte.st, because for collecting in PayPal, you need to have a minimum of 5$ in your shorte.st account. For other methods like Payoneer or WebMoney, you need to have 20$ in your shorte.st account to withdraw.

Once you have 5$ in your earnings, then you can click on your account name and click on WITHDRAW

Then you will get this screen, and from here you can collect your earnings into your PayPal account. But before withdrawing, make sure that you link your Bank Account with PayPal, as the money will be sent to your bank account.


So in this way you can start earning money on Shorte.st and withdraw your earnings from it.

Now comes the most interesting part, which is Mining !!

For becoming a part of mining community, you need to click on the "MINING" button on the top of the screen.

There will be two choices, choose the first one "Miner App"
Then you will head to the page of shorte.st miner

On the first section, you can see the DOWNLOAD button. Just click on it and download the setup of the Shorte.st miner, which is of only 500KB

After head to the folder where you downloaded the setup
And then simply Double Click and then run the setup and install it on your PC

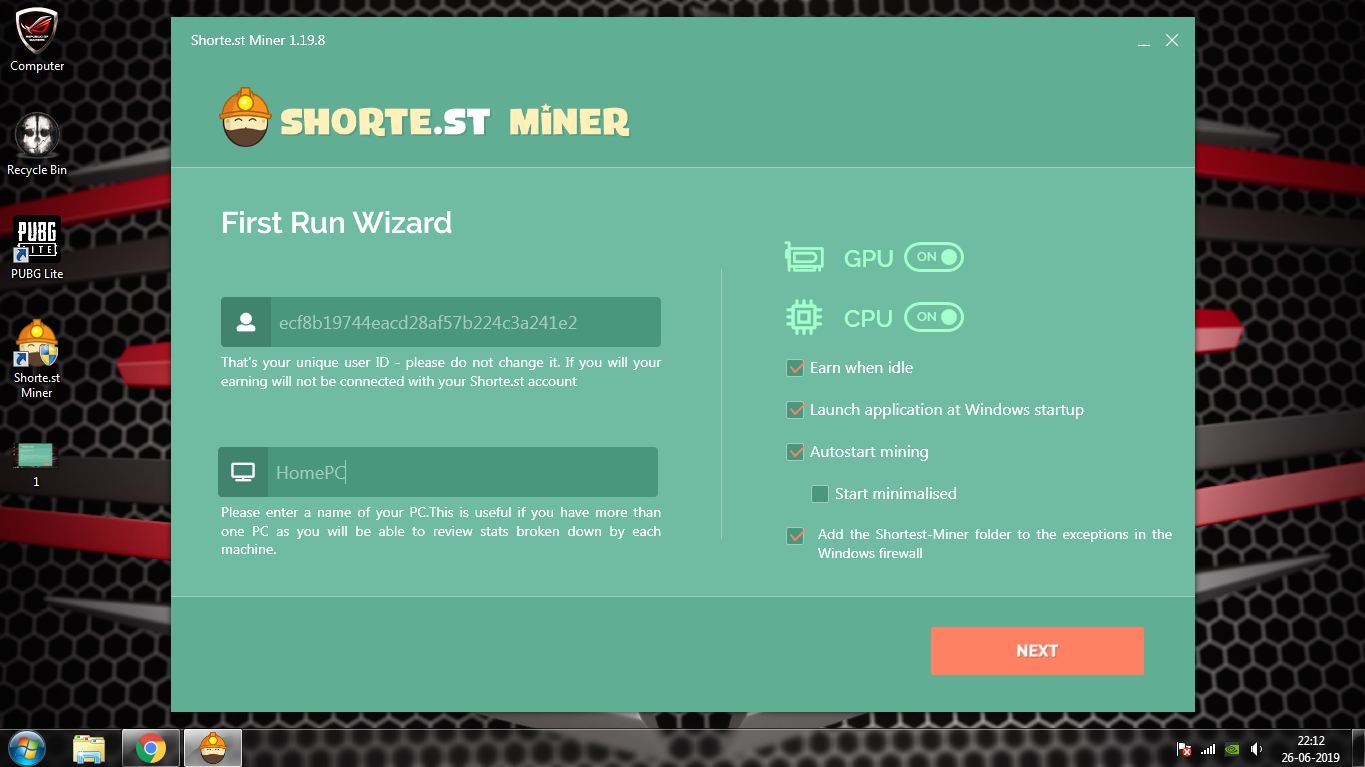
And soon you will get to see this sort of a screen :
Out here, click on the LAUNCH button

Then it will take a bit time and show up this screen :

Then agree to the terms and conditions

Then you will get this sort of a screen and shown above
But you need to make a bit change in the settings ONLY IF YOU WANT TO DO MINING ON YOUR PC AT CERTAIN TIMES AND NOT FULL TIME, OTHERWISE LEAVE IT AS IT IS


Now it will download few necessary files (about 25MB) :


And once the download is over, you will get this screen asking to run a small test on your PC. Just click on start and run the test


And let the test benchmark your PC and telly ou that how much you can earn from your PC. Usually it will show a very small amount, but it keeps changing time to time, so a small amount can also turn to a bigger amount. No matter how much it will pay you, you just need to keep your PC on mining and you will be getting paid for that, it's enough.

During the benchmark process, it will ask for your permissions, reply back with ALLOW ACCESS


Then soon after a few minutes you will get this sort of a screen


So all the tests are completed and now you can start earning from your PC by mining.
Just click on START EARNING


If you get this type of a screen ,  then it means that mining has started. It will take a few minutes to show estimated $, so be patient and then it it go on.
To close the application, just hit the X mark on the top right-corner of shorte.st miner window, and if you wish to stop mining and turn off your system, then click on STOP button in the application windows, and then exit the application. It will get shifted to your taskbar, so right click on it's icon and choose CLOSE and then the program is now off.

So this is how you can sign up on shorte.st and become a part of the Miner Affiliation Program, adn start earning money from your PC. How much of money you have made from the miner will be shown in your shorte.st / statistics page. If no earning is being shown out there, then you need to keep mining for minimum a week (approx 1 hour per day) and then it will be visible out there.
Your earnings will be visible only once they cross a value of $ 0.01

If your PC is weak, so don't worry, you will get a bit less of income, but you will earn a good amount if you continue this mining process. And remember, do not give up within a few days, as big miners keep 4-5 computers on mining, for full 24 hours, so you can easily afford to keep it on mining for 1 hour daily (atleast).


Now comes the matter to discuss : IS MINING SAFE ??
The answer is clear that it is absolutely safe, as it will just keep several background processes active on your system , so your system's hardware will be fully functioning, and will give you rewards in return. So without waiting , you can start this. Yes there are many other mining softwares available, but those softwares actually put your system under such a heavy load that the system can even fail at any time. But this one works in it's limit.


WHAT DO YOU NEED TO TAKE CARE OF ??

Make sure that while mining is going on, you do not use your system, as it will create a tough time for your system to do lots of works at the same time. If you need to do something urgent, then in that case stop mining , close then application, and then do what you want to do. And once your work is dont, launch the Shorte.st Miner again and start the mining.
Take care that your system does not get overheated. If using a laptop, then touch the back part of your laptop, if you feel that a large amount of heat is being generated, then you need to do something; similarly if desktops are crossing temperatures of 58 degree Celsius, then you also need to do something. Laptop as well desktop users need to do something ONLY IF OVERHEATING TAKES PLACE, and what you can do is that you go to the settings of the miner tool, and set the mining level to low. If your system is absolutely fine with the normal mining loads, then you can try for the higher level of mining, that will ultimately result in more income.
So check the temperatures of your system during mining, and accordingly decide whether to go a level up or to come a level down.
It will just be working on your CPU and GPU. So other components of your PC are not going to be affected.


That's all the details about SHORTE.ST MINER PROGRAM
Make sure that you use MY REFERRAL CODE for signing up on this site.
You can not only earn by mining, but also by monetizing your online web pages by displaying ads.
You can do a lot with SHORTE.ST if you use it properly.
WHAT YOU NEED TO HAVE IS PATIENCE
Be patient and let it go on and on, and soon you will get the fruits of your hardwork

I worked only with link shortening for only 4 months, and I made 3 dollars out of it, without mining or using any web scripts, only link shortening.
So you must try it out once,and if you are a YouTuber then you MUST DO THIS for shortening your download links or in video links

If you still have any doubts in your head then just ask me a question down in the comments section.

AND DON'T FORGET TO SUBSCRIBE ME ON YOURUBE !!
www.youtube.com/c/technologyhell


Thanks for Reading till the End !!


Popular Posts